Install Incus on Raspberry Pi 4
Linux Containers, or LXC containers, are not a new technology and searching for LXC can frequently lead to LXD commands. LXD, or Linux Container Daemon, was originally a project under LXC but in 2023 was taken over by Canonical, the company that owns Ubuntu. Canonical was a major contributor to LXD so it makes sense they would bring it under their umbrella, but in an effort to keep the project community driven, Incus was created as a fork of LXD, with some improvements and the goal of staying a community project. Incus is a container and virtual machine manager that I will be using to build some containers on my Raspberry Pi 4.
Install Debian Without GUI to Raspberry Pi
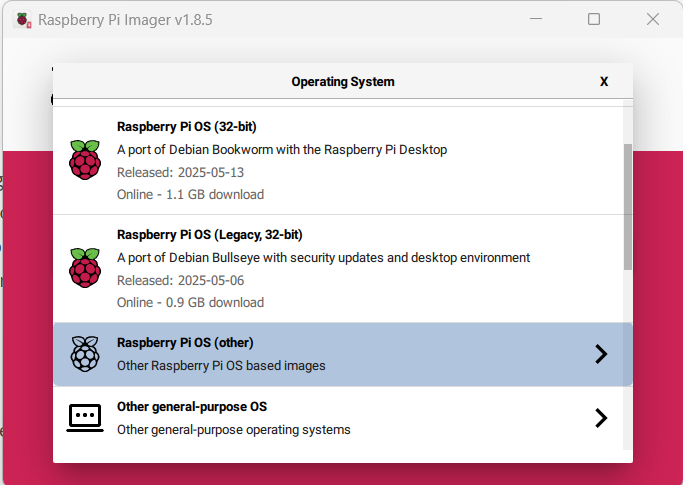
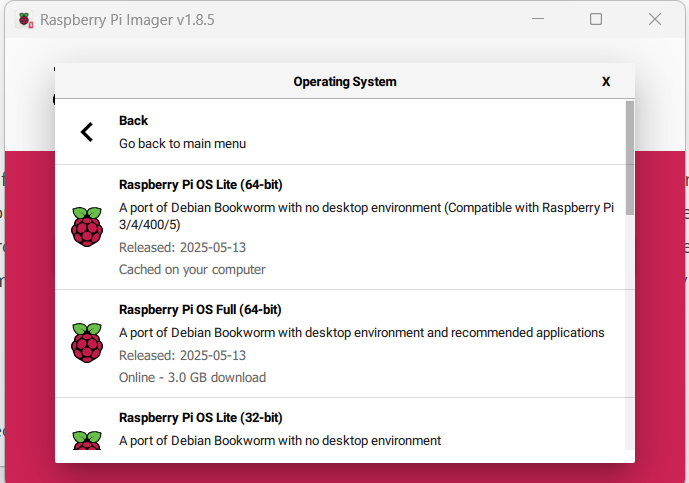
Recently I installed LXC in Ubuntu, but today I’ll be using an older Raspberry Pi 4. If you haven’t already installed an operating system on your Raspberry Pi, I recommend Debian Lite. First install Raspberry Pi Imager, choose your Raspberry Pi model and storage, and for OS choose the (other) category. You will find Raspberry Pi Lite
You can also configure some options on the next screen, including enabling ssh and creating a user, but I’ll leave that up to you. If you leave all things default then you might need to find default raspberry pi credentials to login.
Install Incus to Debian Bookworm
Debian will be including Incus in Trixie, supported until 2029, but meanwhile Incus is available as a backport in Bookworm. First get up to date then add the backports repository as root.
~# apt update
~# apt upgrade
~# echo "deb http://deb.debian.org/debian bookworm-backports main" > /etc/apt/sources.list.d/bookworm-backports.list
~# apt update
Since I’m only interested in running containers and not VMs, I’m only going to install incus-base. If you try to run apt install incus you will get an error.
~# apt install incus-baseMake Non-Root User an Incus Admin
Since I don’t want to run as root all the time I’m going to add my regular user to Incus-Admin to give them full control over Incus. I could probably skip this and sudo each Incus command for a similar experience, but I’m choosing to do this since it’s in the documentation.
$ sudo adduser $USER incus-admin
$ newgrp incus-admin
The
First steps with Incus – Incus documentationnewgrpstep is needed in any terminal that interacts with Incus until you restart your user session.
Initialize Incus
Incus can be initialized interactively. You will be asked about clustering, storage, networking and remote access. If you have specific needs for these options, now is the time to set them up. More details below, but I left most of the defaults to get started. Start initialization:
$ incus admin initClustering
Clustering combines several Incus servers allowing them to be managed together and spreading the workload over the cluster members. A cluster of two members can be created, but it’s strongly recommended to cluster at least three as this allows the cluster to lose up to one member and still be able to establish quorum.
The default option is to leave clustering disabled. Since I’m not sure if I will be clustering, I’ve left it disabled. Clustering can be enabled later.
Storage Pool
The recommendation is to use a separate partition or disk for production workloads, but the default behavior when creating a storage pool is a loop-backed pool. During initialization you are given the option to create a new storage pool. I changed the name from “default” to “local” and left the default path “/var/lib/incus/storage-pools/local.” I did not see the option to choose the storage driver, so presumably this tool creates the first storage pool using the Dir driver.
Networking
During initialization Incus offers to create a new bridge. I accepted this default bridge. Additional bridges can be created later.
Other settings
I left the remote access option to default no. I wouldn’t want to turn that on without further considering security concerns. I left Automatic Image Update to yes. I did not print a YAML preseed.
Create a Container with Incus
You can use the official image server directly with Incus commands. To see a list of available images run:
$ incus image list imagesNow to install a Debian Trixie container on my Raspberry Pi that is running Bookworm, I can run:
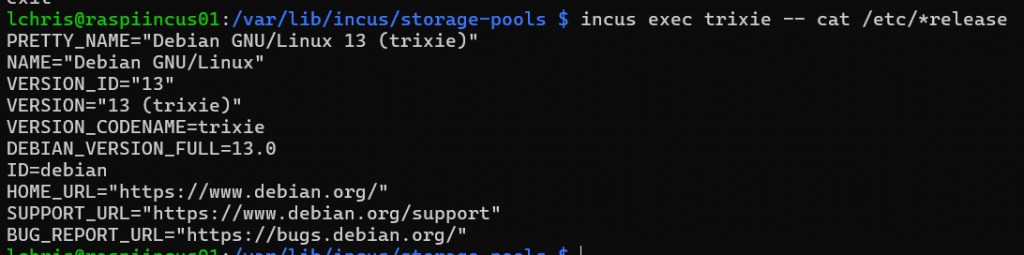
$ incus launch images:debian/13 trixieThis downloaded the Debian 13 image from the official image server and created a container called trixie. You can see that the container was created and is running with:
$ incus listManage Containers with Incus
Commands can be run inside your container with Incus from the host.
This includes running a shell.
$ incus exec trixie -- bashCreate a snapshot of the container named “trixie” and name the snapshot “fresh”
$ incus snapshot create trixie freshRestore the fresh snapshot of trixie
$ incus snapshot restore trixie freshDelete a snapshot
$ incus snapshot delete trixie fresh
Delete the container. Stop it first.
$ incus stop trixie
$ incus delete trixie