
Perforce on Oracle Cloud E2 Micro
Oracle cloud has a pretty good free tier, but unfortunately some regions are so busy that free tier instances are not available. Pay as you go customers get priority, so if you are comfortable managing the budget and billing, I recommend upgrading to have more chance at getting a free server.
Deploy an Instance
I will not go over how to deploy or connect to an instance, but I will say that Oracle allows up to 4 Ampere CPU and 24 gb of ram. At the time of this writing, that’s almost always going to be 4 – 1 cpu / 6 gb instances. But be warned, not all software will work on Ampere, or aarch64, architecture.
Perforce doesn’t seem to have an aarch64 repository (or I just missed it in the docs), so I’m going to go with an E2 Micro, AMD64, instance instead. This only gives 1 cpu and 1gb or ram, but will be enough for a proof of concept. I chose to use an Oracle 10 image to keep it free, despite the instructions below referencing RHEL
Add the Repository
As I mentioned, I used an Oracle Linux 10 image, but am using Perforce’s RHEL repo anyway. To install the repo add the key, build a repo file, than update dnf (or yum). I chose to use rhel 9 repo after browsing, but this is just a guest because Perforce’s documentation missed it’s second round of proof readers (j/k Perforce 🙂).
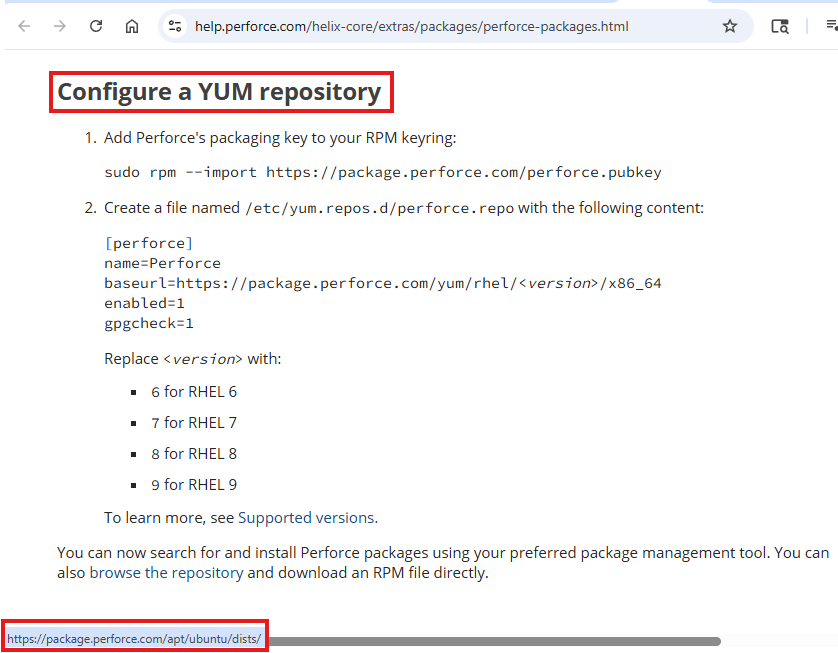
sudo rpm --import https://package.perforce.com/perforce.pubkey
sudo bash -c 'cat > /etc/yum.repos.d/perforce.repo << EOF
[perforce]
name=Perforce
baseurl=https://package.perforce.com/yum/rhel/9/x86_64
enabled=1
gpgcheck=1
EOF'
sudo dnf update -y
Install the Server
sudo dnf install p4-server -yConfigure the Server
Next run the configure script to set some options and create a super user account. There’s more information here.
sudo /opt/perforce/sbin/configure-p4d.shI chose:
- Service Name: Perforce
- p4root: /srv/perforce
- Unicode-mode: n
- case-sensitve: y
- server address: default
Now, open the firewall.
sudo firewall-cmd --permanent --add-port=1666/tcp
sudo firewall-cmd --reload
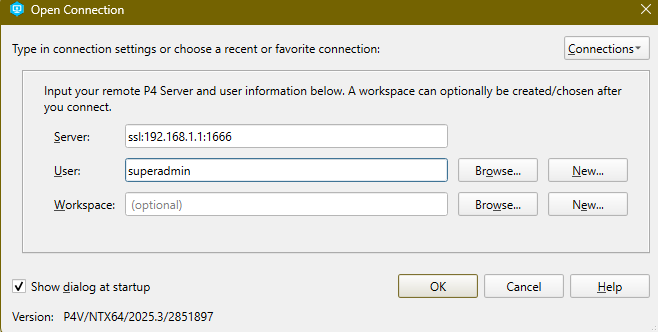
Connect to Your Server
Now the server is up and running. Download the Perforce client and get connected. Warning the redirects on this site are crazy so the link may be garbage, but at the time of this writing you can get P4V here
Final Thoughts
This install is pretty straight forward, but some links in the docs led to marketing materials, which feels pretty bad from a technical perspective, in addition to some discrepancies above. Not featured in this article is my first failed attempt to install on aarch64 Linux, but the “non-package installer” documentation is missing any information about post install configs or configuration in general. There’s a reference to a config script, but that’s only included in packaged installs and not the tar file.
After the server was installed, I installed p4v to find that it’s not intuitive at all, particularly the admin tabs. In 2010 I worked at a school district that used software that was 15 years out of date. That’s what the admin interface feels like like: a series of windows from a report builder that reference database tables directly and may or may not be related to each other.
I’ve created some admin accounts and passed them to my teammates. It took me 3 tries to get my files added to the workspace, but that might be because the micro intance. I’m going to move on for now and revisit this. Next, I’ll try tortoiseSVN