Setup Roaming Windows Client with Wireguard to Mikrotik Router
Connect to your home LAN with Wireguard
- Install Wireguard on the Client
- Build a configuration file for the Client
- Create Wireguard Interface on the Mikrotik router
- Assign the Wireguard Interface an IP address
- Create Wireguard Peer on Mikrotik
- Create Firewall Rules
- Add Endpoint Address and IP to Client Configuration
- Conclusion
Install Wireguard on the Client
Download and run the installer from Installation – WireGuard
Build a Configuration File for the Client
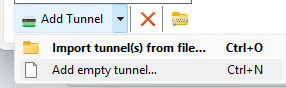
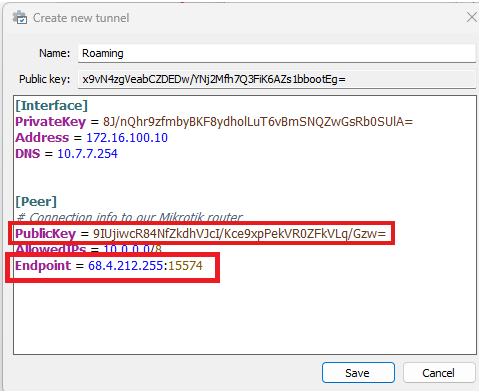
Once the program has been installed, open it and click the down arrow next to Add Tunnel button on the button left of the window. Select the option to add an empty tunnel
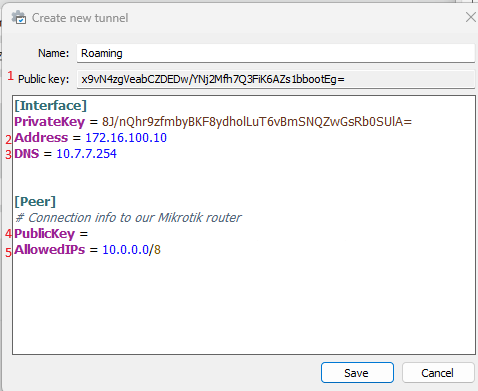
A new screen pops up with an Interface section and a PrivateKey. Never share the PrivateKey. I am aware of the irony of this statement.
- Copy the public key to be used in the Mikrotik Configuration
- Add a line Adresss = ipaddress. This identifies your machine to the router through the tunnel. You must avoid IP conflicts with both local and remote networks. i.e. Don’t re-use your LAN IPs and don’t use 192.168.1.x, since many Wifi are going to hand something like that out by default.
- Optional: Give a DNS server to be used while connected.
- Create a [Peer] section and add a PublicKey = publicKey. This public key will be generated later so you can leave it blank for now
- Add an AllowedIP = CIDR Blocks. These are the IPs that will be routed through the Wireguard interface. 0.0.0.0/0 will route everything through your VPN. I’m only including 10.x.x.x IP Addresses.
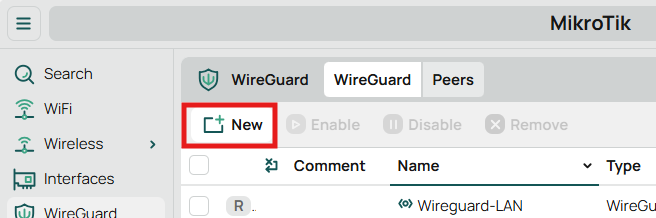
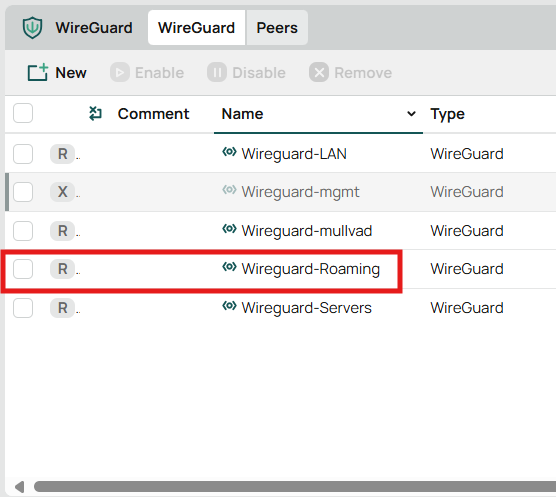
Create Wireguard interface on the Mikrotik router
On the router go to Wireguard section and click New
- Give your Wireguard interface a name
- Choose a port or leave the default. I use a random port.
- Click OK. This closes the window and generates a key pair.

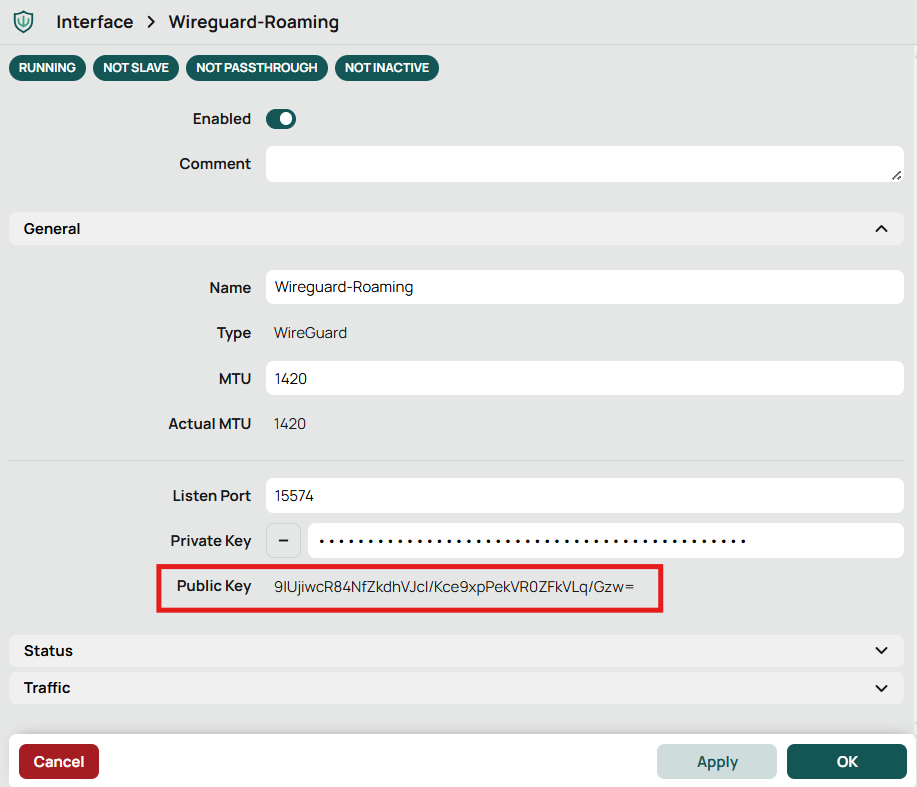
Click the newly created Wireguard server to re-poen the settings window.
Copy the public key. This public key will be added to your client configuration later. Never share the private key.
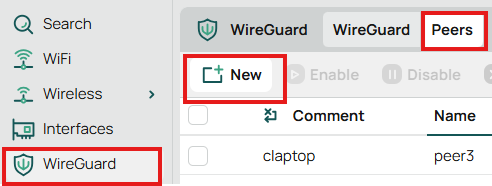
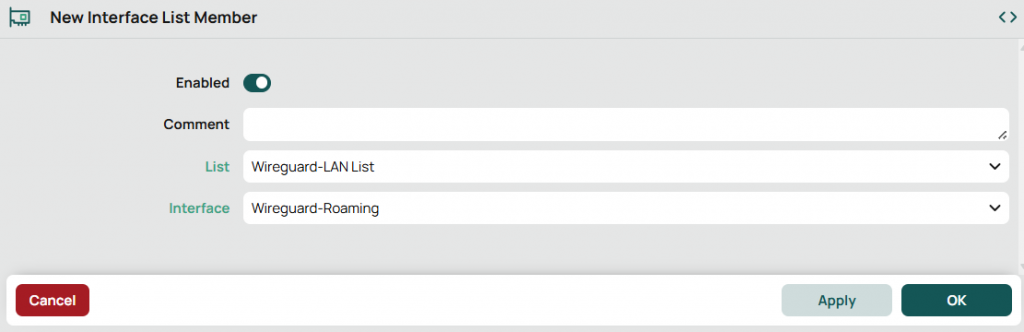
Create Wireguard Peer on Mikrotik
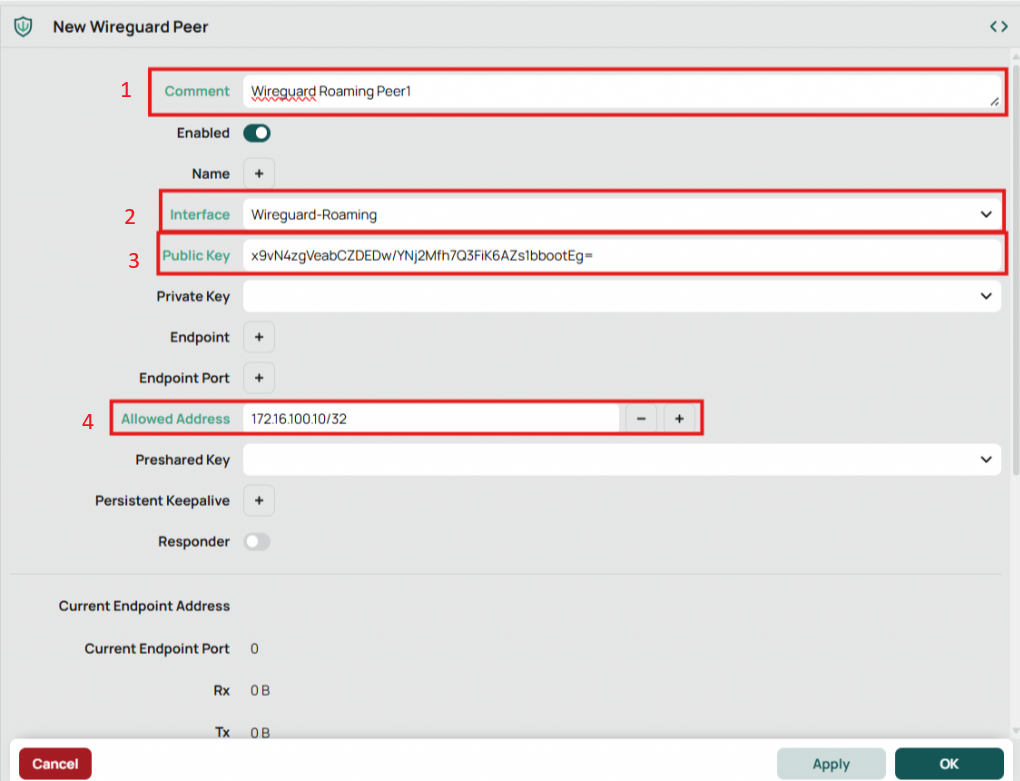
On the Wireguard screen select Peers and click New.
- Add a comment or name as you see fit
- Choose the interface you created
- Enter the client’s public key that was generated on the client in the early steps. Not the public key from the Mikrotik interface that was just created.
- Add your client’s IP address as an allowed address
Assign the Wireguard Interface an IP address
Go to IP -> Addresses and click New
This IP address will identify the interface on this router. The network should include the IP addresses you assigned to your client. Assign this IP addresses to the Wireguard interface you created.

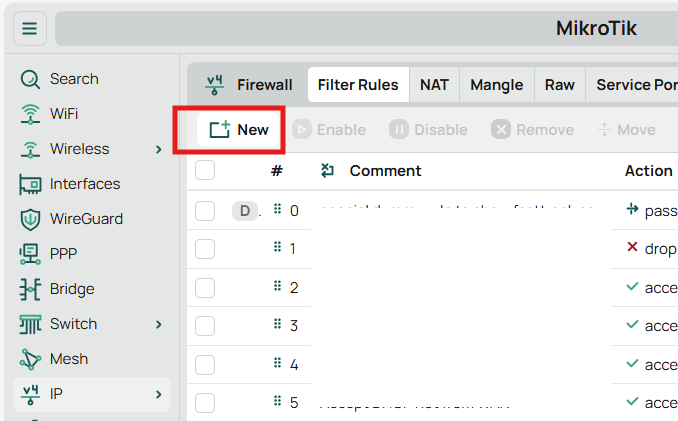
Create Firewall Rules
You will likely need to firewall rules. First to allow the Wireguard connection to your router from outside your network and second to allow your Wireguard traffic to talk to your LAN.
Go to IP -> Firewall
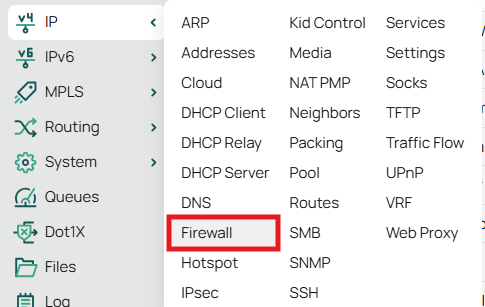
Click New
Firewall Rule to Allow Wireguard Connections
- Chain: Input
- Protocol: UDP
- Dst. Port: The port you used when you setup the interface
- In. Interface List or In. Interface: I set this to my WAN interface because that’s where I expect Wireguard connections to originate from
- Action: Accept
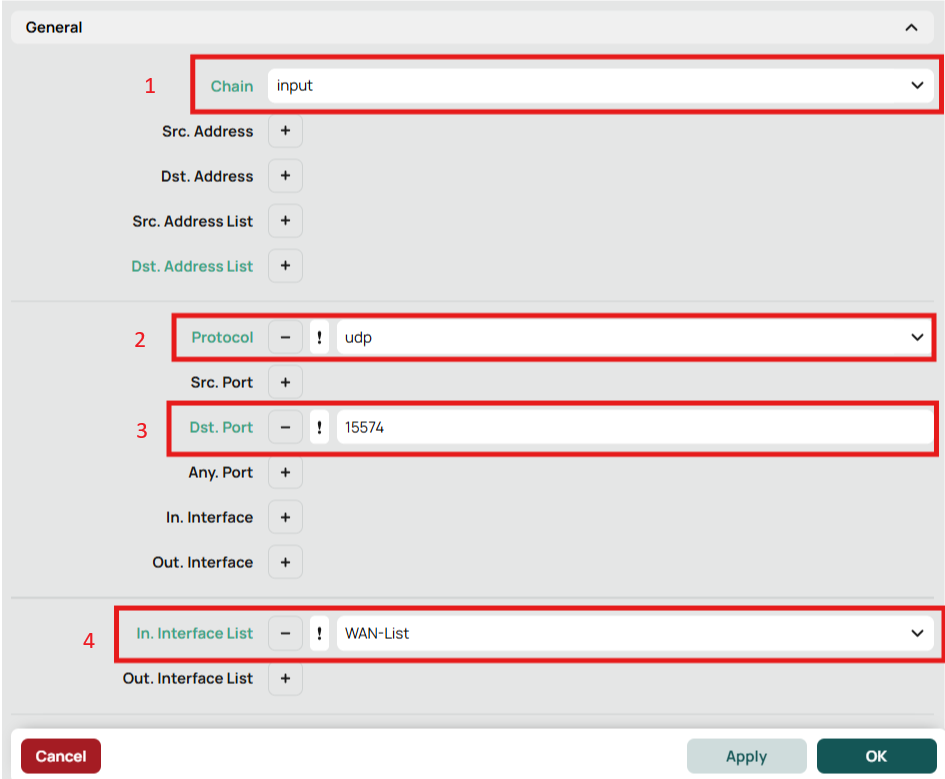
Remember that the order of firewall rules matter so place your new rule the appropriate order for your setup

Firewall Rule to Allow Wireguard Clients Connection to LAN
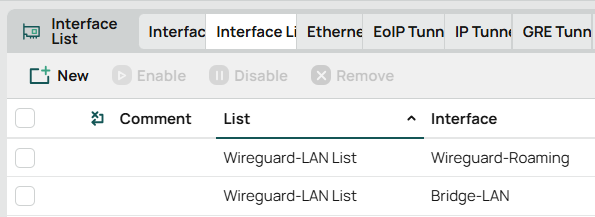
There are multiple ways to do this, but find the easiest is to add an interface list that includes the LAN bridge and the Wireguard interface.
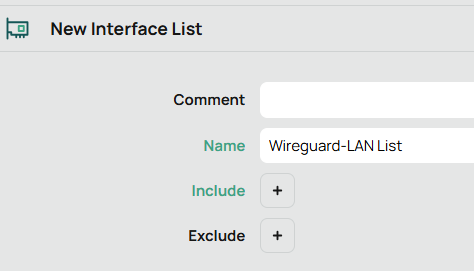
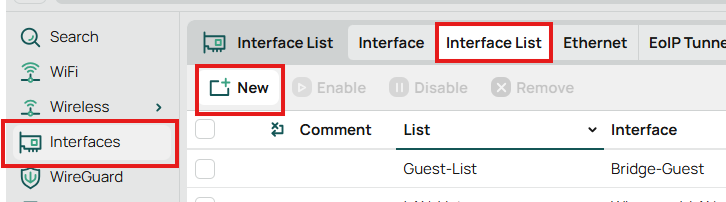
Go to Interfaces -> Interface List and Lists on the right side

Create a new List
Now go back to the Interface list tab and Click new. Yes this is a clunky interface.
Choose the List you created above and your LAN. Click OK.
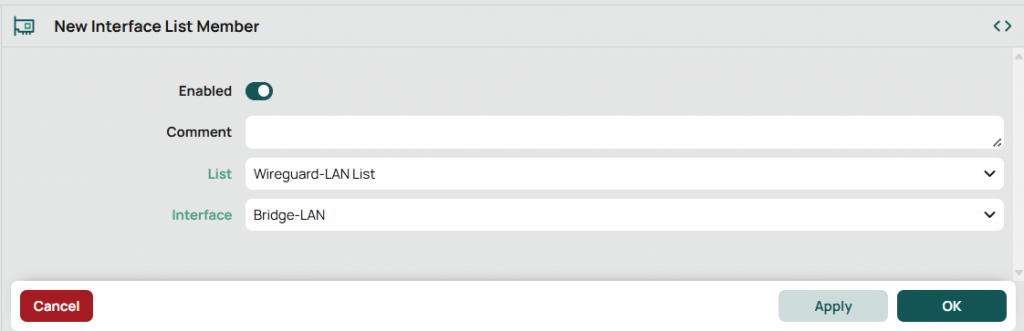
Repeat, but this time include your Wireguard interface.
You should see both interfaces listed as part of the list you created
Now create the Firewall Rule
Go to IP -> Firewall. Click New.
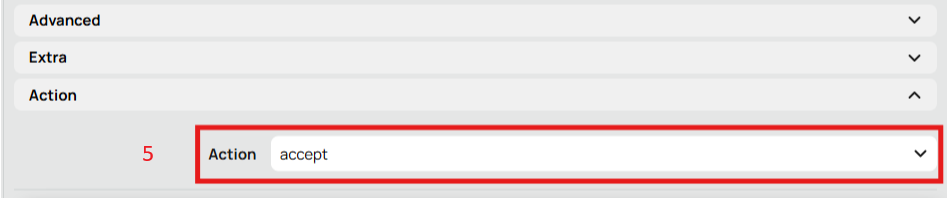
- Chain: forward
- In. Interface List: The list you created
- Out. Interface List: The list you created
- Action: Accept
This rule will allow bidirectional communication between clients using the Wireguard interfrace and your Local Network. Remember to place it appropriately in your firewall rule order.
Add Endpoint Address and IP to Client Configuration
Back to the client. In the configuration add the Public Key that was generated on the router. Finally, add the public IP address of your router and the port that you opened. If you are not paying for a static IP then your ISP probably isn’t giving you one, and so your IP will change over time. I recommend setting up dynamic DNS so you can use a hostname instead of an IP address. Without dynamic DNS you will need to update this configuration anytime your IP changes. For this tutorial you can use icanhazip.com to get your current public IP address. Here’s a fun article about the site.
Conclusion
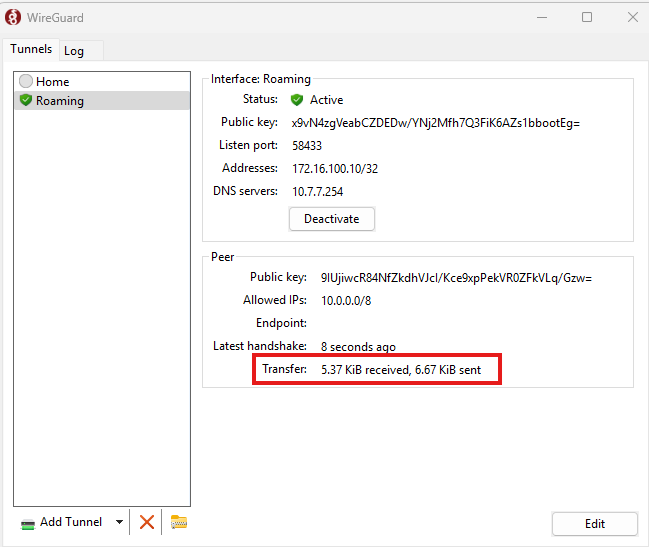
Click activate. You should see transfer in both directions immediately.