
Use Windows Subsystem for Linux
Maybe I’ve become too far removed from the open-source community, but I recall it used to be vogue to hate on Microsoft. These days I work for an enterprise that is 99% Windows and so for better or worse, I’m using Microsoft. I grew up using Linux desktop and server and countless distributions over many years so when I joined a Microsoft shop all my problem solving defaulted to Linux tools. I quickly discovered how advanced PowerShell had become, and soon I was right at home using native Microsoft tools, but every once in a while, I needed something Linux
Linux Tools on Windows
Certificate services are one of those areas where I’m comfortable outside the Microsoft realm. Every once in a while, I would need to generate a certificate signing request or build a pfx file, not so much anymore since Cloudflare handles public facing web certs, and when that happened, I would gravitate toward OpenSSL. Before Windows Subsystem for Linux (WSL), I might install Git and use the OpenSSL.exe that came with that. Plus, there are the handful of appliances out there on the network that require SSH, and my go-to Windows solution was Putty. Truth be told, the first thing I did when I started in my current role was install Cygwin on my workstation so I could have my familiar bash shell. Eventually, I got comfortable enough with PowerShell that I didn’t need it anymore, but it was nice to have the training wheels.
Those days are behind me now. In 2019 Windows shipped with a Linux kernel and made using Linux tools on Windows that much easier. Not only can I use Linux tools on my Windows workstations, but I can get a full-fledged distribution installed that I can access in a Windows 11 Terminal Window.
Installing WSL on Windows 11
I happened upon WSL by accident the first time and after seeing something about it on the internet and no previous knowledge I tried typing “wsl” into PowerShell. It turns out, that was enough to get started.
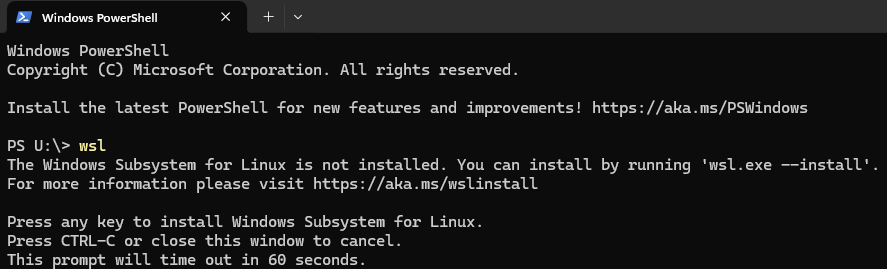
To install Windows Subsystem for Linux run the following with admin privileges:
> wsl.exe --install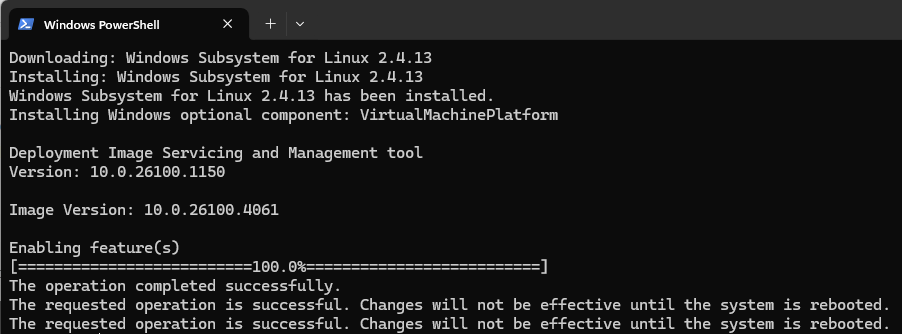
Reboot.
Installing Ubuntu with Windows 11 PowerShell
Just like before, typing “wsl” gives you some guidance.

To see a list of available Linux distributions on Windows run:
> wsl.exe --list --online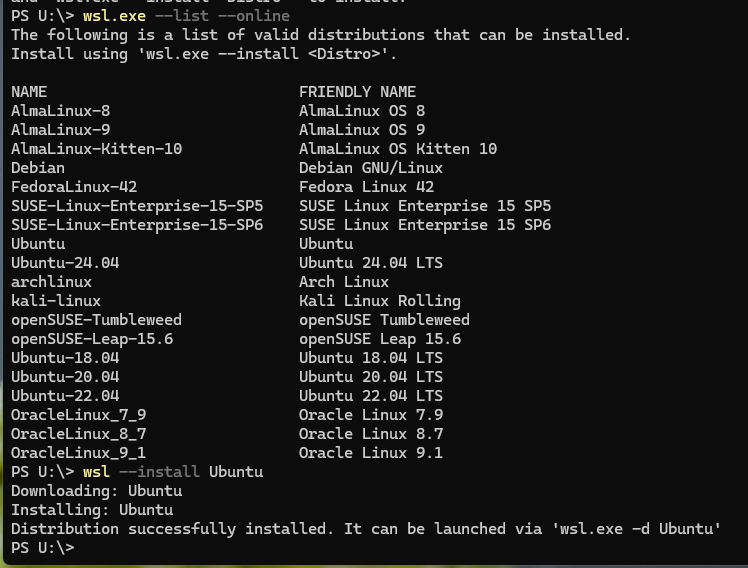
To install Ubuntu run:
> wsl.exe --Install UbuntuRunning Ubuntu in PowerShell
To run a Linux distrubution that was installed with WSL, use the -d flag
> wsl.exe -d <Distribution Name>You will be prompted for a username and password, and that’s it. You’re done.
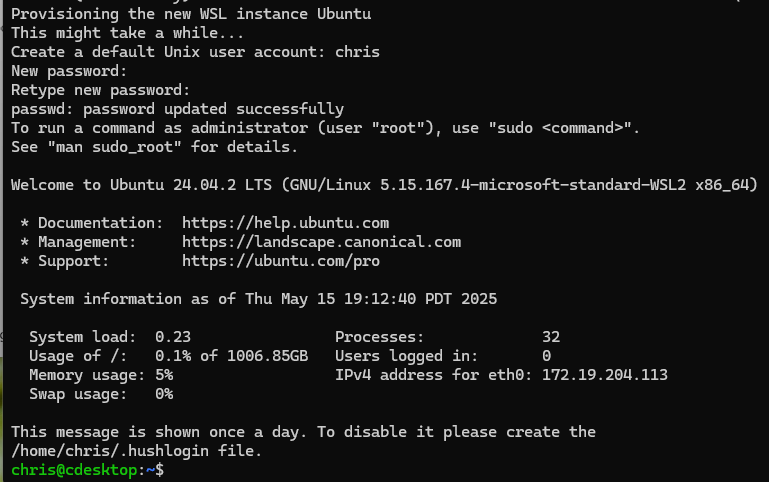
You are now running what is basically an Ubuntu VM with just three PowerShell commands.

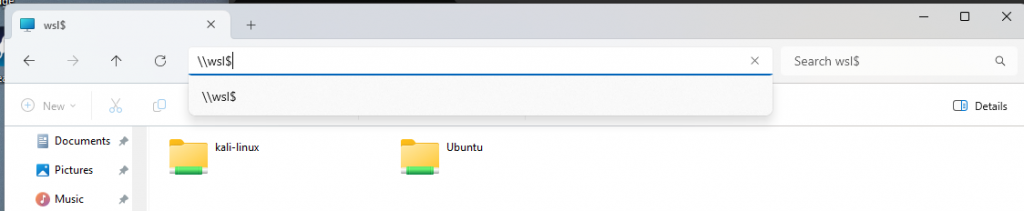
How to Access Files on WSL
Each Linux distribution installed with wsl.exe creates an admin share that you can access locally from your host workstation. Type \\wsl$ in your explorer address bar to see the filesystems of the guest Linux distributions
Installing Kali Linux with Windows 11 PowerShell
Who loves security? This guy. I don’t use Kali in my day-to-day because I don’t do pen tests, but I know it’s the “hacker” tool of choice because it has so many pre-installed tools. Kali is a Debian based distribution listed as available by wsl. To install Kali with PowerShell run:
> wsl.exe --install kali-linuxYou can then run the distribution with:
> wsl.exe -d kali-linuxYou will be greeted with a message that you are running a minimal installation.

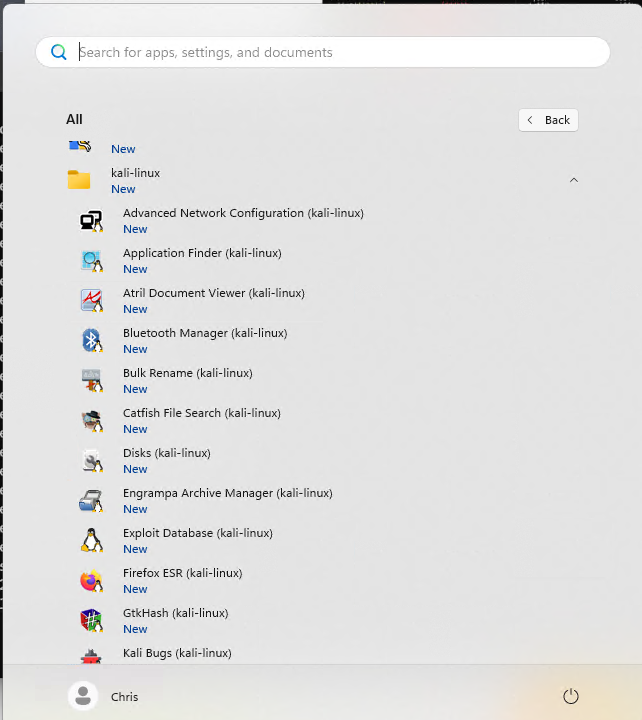
GUI Applications in Windows WSL
Microsoft Windows now supports Linux GUI applications in WSL. Use the package manager to install a GUI application and Windows will create a Start Menu icon for the application. In the Case of Kali Linux, for example, the GUI application Win-KeX has been created specifically to add Kali’s suite to a Windows environment. If you’re not a White Hat and you got here while researching, I suggest you turn back now 😁 (why would you want attack tools on your Windows Machine?).
For example. In Kali, to get a GUI in Windows, you can run the following in your Kali instance:
$ sudo apt update
$ sudo apt install -y kali-win-kex
Kali GUI tools will now be available on your Windows Start Menu
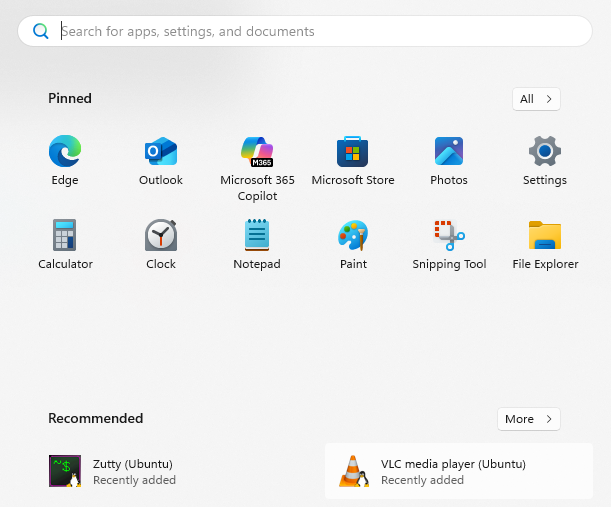
In Ubuntu WSL you might install VLC media player with apt the same way:
$ sudo apt update
$ sudo apt install -y vlc
VLC will be in your host Start Menu
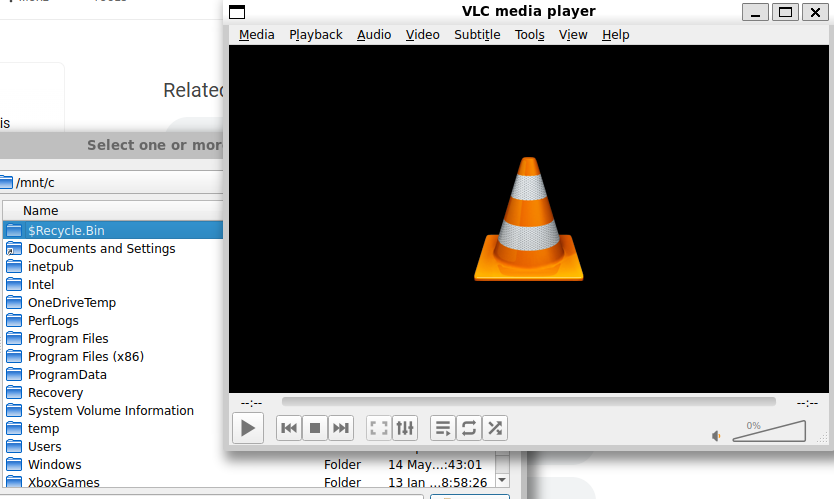
Accessing Host files in a Linux guest using WSL
You can access the host C: drive by navigating to /mnt/c in your guest
Conclusion
Virtualizing Linux on a Windows desktop has been an option for a long time, but the ease at which PowerShell and WSL lets you install Linux distributions is a game changer. Add the extra functionality of Linux GUI applications the choice between Linux vs Windows becomes incredibly blurred.
In regard to security, keep in mind that this functionality isn’t intended to create any sort of isolation between your Windows workstation and the Linux distribution, so assume the host and guest in this virtualization scenario are the same workstation. I’m saying what shouldn’t need to be said here. Please don’t build a production Linux server on your Windows workstation.